Install Home Assistant on Docker
Whether you're using Docker on the CLI or through Portainer, this tutorial will guide you through the installation process so you can manage your smart home devices yourself.

Whether you're using Docker on the CLI or through Portainer, this tutorial will guide you through the installation process so you can manage your smart home devices yourself.
Jump to:
- Install Home Assistant on Docker via the CLI
- Install Home Assistant on Docker via Portainer
- Setup Home Assistant
What is Home Assistant?
Home Assistant is open source software for managing smart devices in your home. From smart lights such as Philips Hue, to Nest thermostats and cameras, Home Assistant is a self-hosted smart automation solution.
Install Home Assistant on Docker via the CLI
You have two methods in which you can install Home Assistant on Docker, via the CLI (this part) or through Portainer. Both methods assume you've installed Docker, if you haven't, I've written a tutorial on how to install Docker.
Step 1 - Create a volume
Let's start by creating a volume from which our configuration will be stored:
docker volume create homeassistant_dataStep 2 - Set up the docker container
Next, let's pull the image and start the Home Assistant container:
docker run -d \
  --name homeassistant \
  --privileged \
  --restart=unless-stopped \
  -p 8123:8123 \
  -e TZ="Europe/London" \
  -v homeassistant_config:/config \
  --network=host \
ghcr.io/home-assistant/home-assistant:stableThe image will pull and install. Ok, now it's time to set up Home Assistant. Skip to the installation instructions.
Install Home Assistant on Docker via Portainer
Using the CLI isn't for everyone, so here's how to install Home Assistant with Docker using Portainer. For this part of the tutorial, I will assume you have Portainer up and running. If you don't, I've previously written a tutorial on installing Portainer.
Step 1 - Create the volume
Begin by choosing 'Volumes' in the sidebar, then choose 'new volume'. You will see the following interface:

In the name box, enter portainer_data and leave the defaults as they are. Proceed to click 'Create the volume'.
Step 2 - Set up the docker container
Navigate to 'Containers' and go ahead and choose a 'add container'. You will see the following interface:
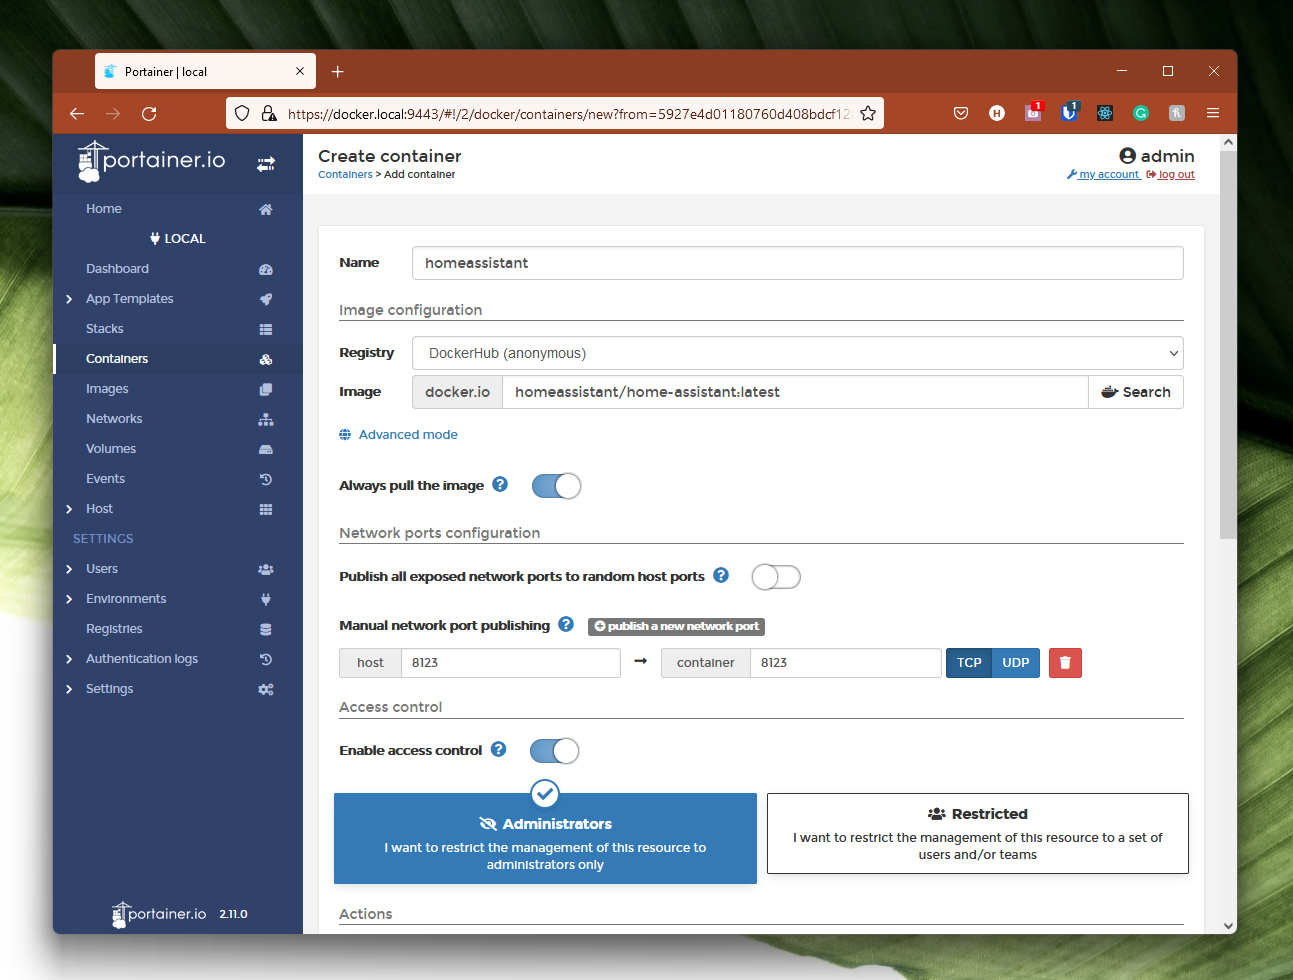
Enter the following values:
- In name, enter
portainer. This can be whatever you want, though. - In image, enter
homeassistant/home-assistant:latest. This will pull the latest image from Docker Hub for portainer.
Click the 'publish a new network port' button and enter 8123 in both 'host' and 'container'. This maps a port to the container which we will use to access the UI.
In the 'volumes' tab, map a new volume with:
/configin the container- Choose the
portainer_datavolume we created before in the 'volume' drop-down.
In the 'Env' tab, create a new enviromental variable:
- Enter
TZas the 'name' - Enter your timezone in the 'value' field. Because I'm in the UK, I'm entering
Europe/Londonhere.
In the 'Restart Policy' tab, click 'always'. In the 'Runtime and Resources' tab, enable 'Privileged mode'.
Once you've done that, you're ready to go. Hit the 'Deploy the container' button. The pulling of the image and setting up the container can take a while, so be patient. Once that's started, we can get started with Home Assistant.
Setup Home Assistant
Once you're up and running, let's get going with setting up your Home Assistant docker container. Let's visit the admin URL. If you're using a local Docker container, you can access the admin via http://localhost:8123.
For this example, I've set up my Home Assistant container on a Raspberry Pi which has the IP `10.0.1.137`, so I'll be visiting http://10.0.1.137:8123 to access the admin interface.

Go ahead and set the name, username and password fields. Once you've done this, you'll be asked to set your location up. Use the built-in 'detect' tool and just refine this by moving the pin.
You will also be asked to set your elevation, timezone and currency. If you don't know your elevation (why would you?), use freemaptools to find this. Your timezone should already be selected (we defined this as an environmental variable) and your currency.
Next, you'll be asked to send anonymous user data to Home Assistant. Depending on your stance on privacy, choose as many or as few as these as you want.
Finally, Home Assistant will automatically detect any smart devices already on your network.
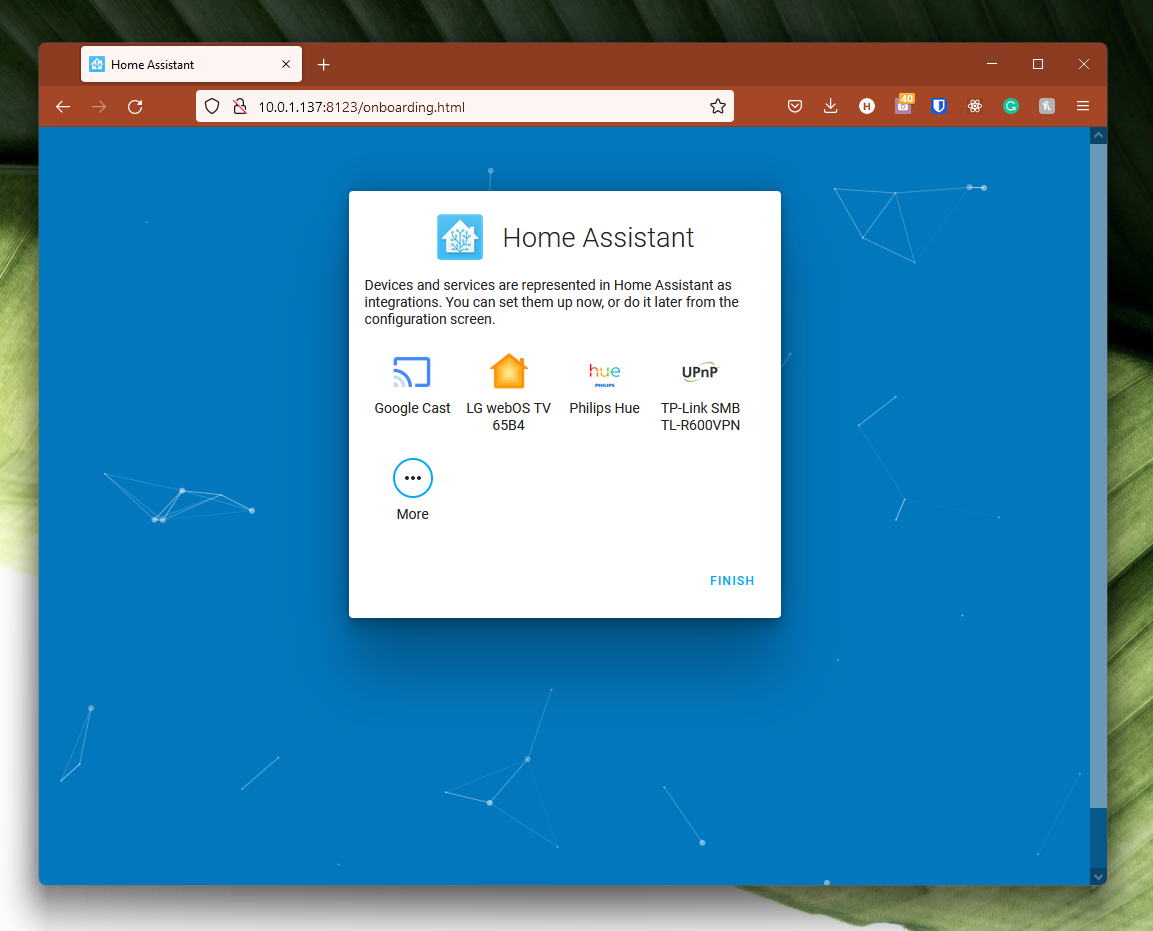
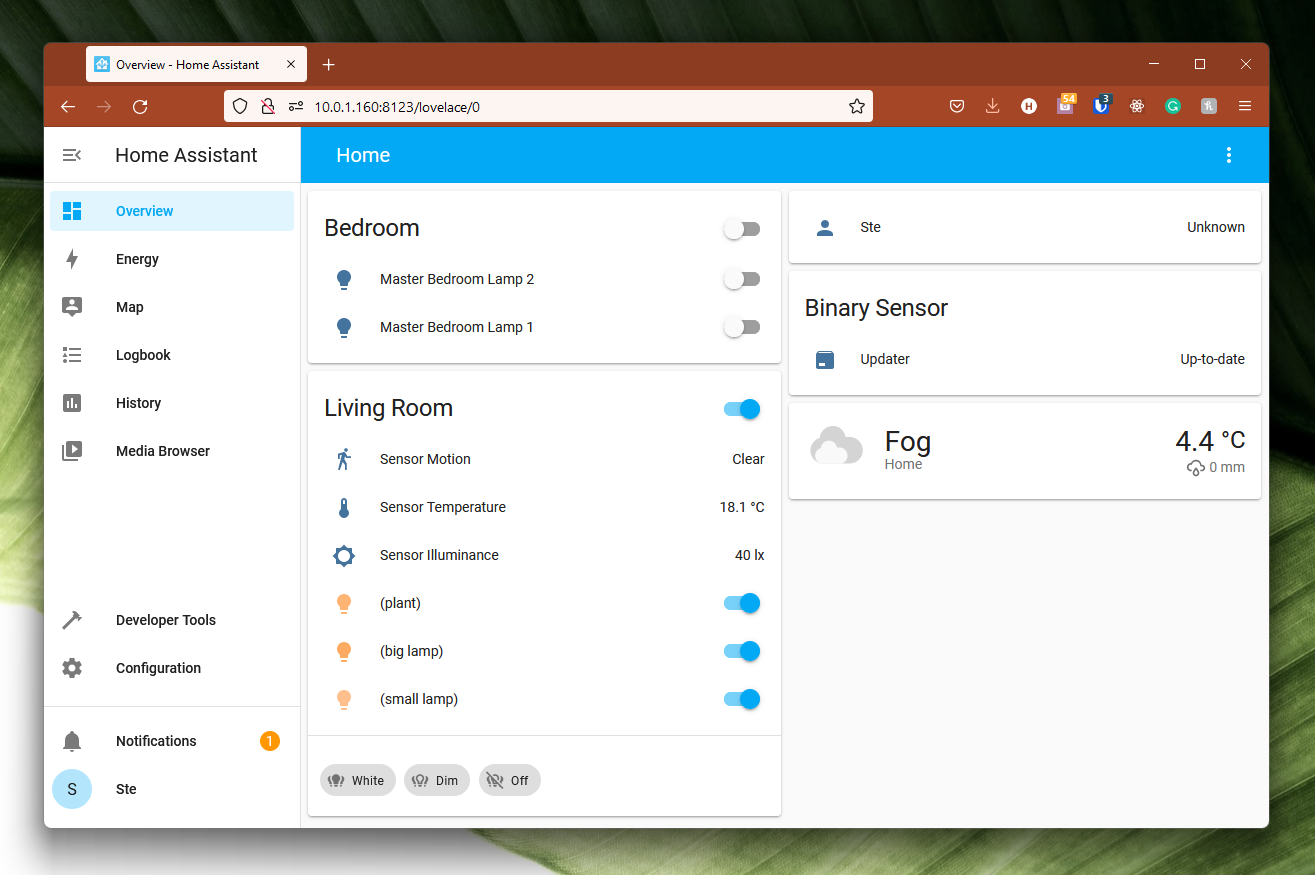
Go ahead and get them set up. Once you've added your devices, you're free to set up your automations.
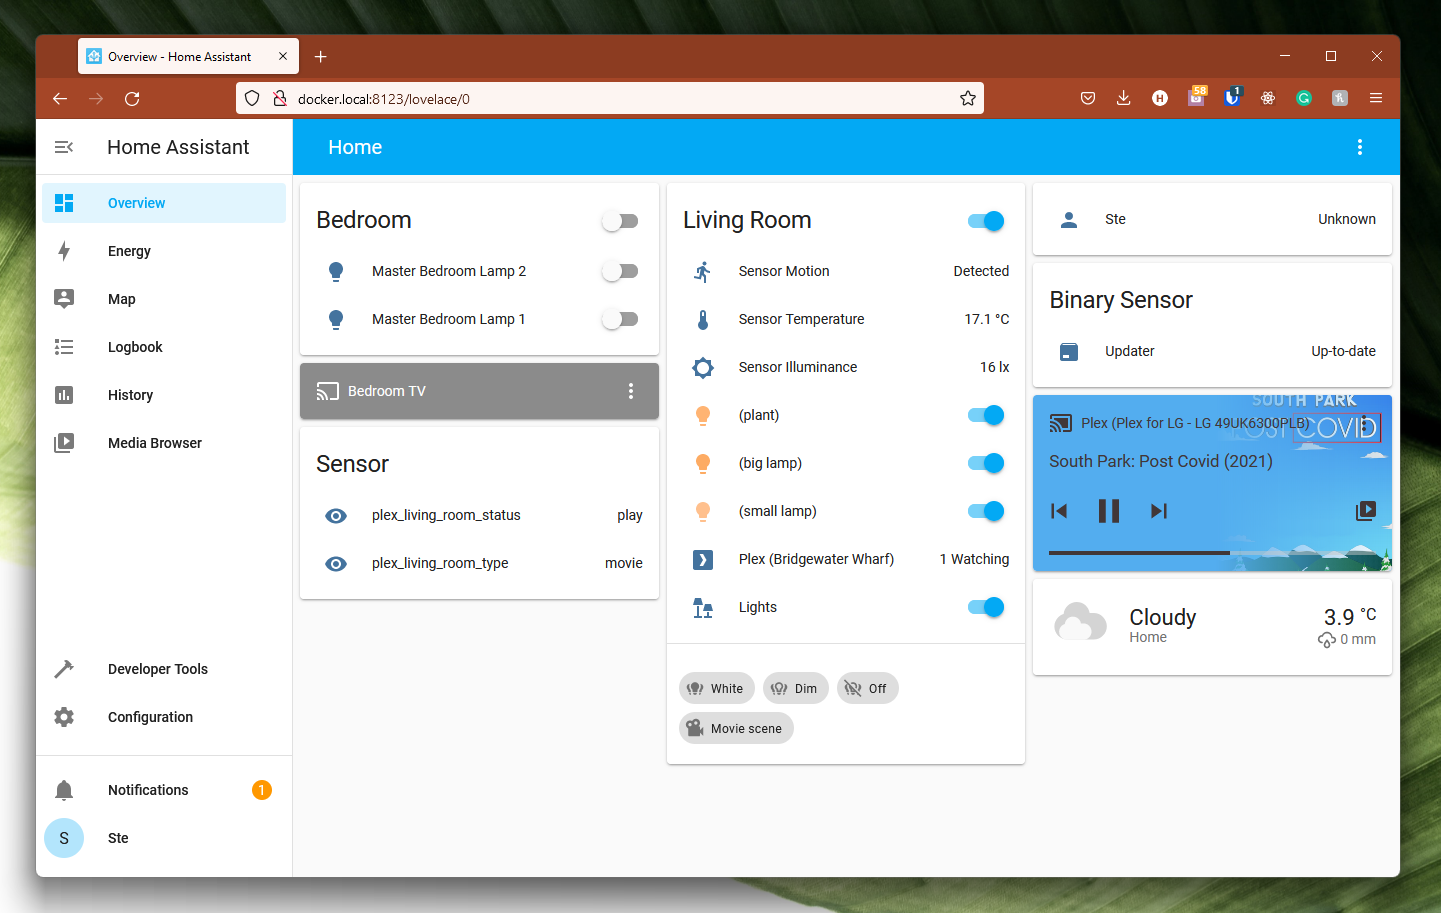
Once your devices have been added, they appear in the dashboard. You can begin creating your automations based on sensors in your home or virtual sensors, such as when the sun goes down, or when your Plex server plays.
What can you do with Home Assistant?
Home assistant is a centralised home automation system. Aside from your smart home devices, your imagination is your only limit.
Basic automations, such as lights coming on when light sensors to more advanced ones. For example, when I play a movie on Plex, a 'movie' scene is activated on my Philips Hue lighting.
Conclusion
Feel free to hit the comments below to feedback for ask for help. Why not share what you've done with your Home Assistant setup.