Install Gnome Desktop Environment on Raspberry Pi 4
This tutorial will guide you through installing Gnome Desktop environment on Raspbian on a Raspberry Pi 4

For anyone who follows by blog, I am running [an experiment](https://www.stewright.me/2019/09/can-you-use-a-raspberry-pi-for-web-development/) to see if the Raspberry Pi 4 really can be used as a development desktop computer. For me, the default Raspbian Desktop environment is just too simplistic. In this tutorial, I will guide you through installing and running Gnome.
UPDATE: A few people have reported issues with the latest version of Gnome working with Raspberry Pi 4. Numerous Wi-Fi and keyboard issues prevent Gnome working correctly. I will update the post when I know more.

Prerequisites
Whereas the Raspberry Pi 4 can run Gnome, it will be very slow when running from a MicroSD card. I recommend investing in either an USB external SSD drive or a high-quality USB Flash drive and following my tutorial in booting Raspbian from these devices on a Raspberry Pi 4.
I recommend using the Raspbian Buster Lite image as a starting point as this doesn't have all the bloat that comes with the Desktop version of Raspbian.
In addition, I recommend these commands are run from the Raspberry Pi itself and not from SSH. Also, your Raspberry Pi should be connected via ethernet as the installation process halts Wi-Fi part way though while a Wi-Fi package is installed.
Step 1 - Get everything up-to-date
Run the following commands to ensure Raspbian is fully up-to-date:
sudo apt update -y
sudo apt upgrade -y
Step 2 - Install Gnome on Raspberry Pi 4
Now that Raspbian is all up-to-date, let's install Gnome. Run the following command:
sudo taskselAfter a short wait, you'll see the following screen:
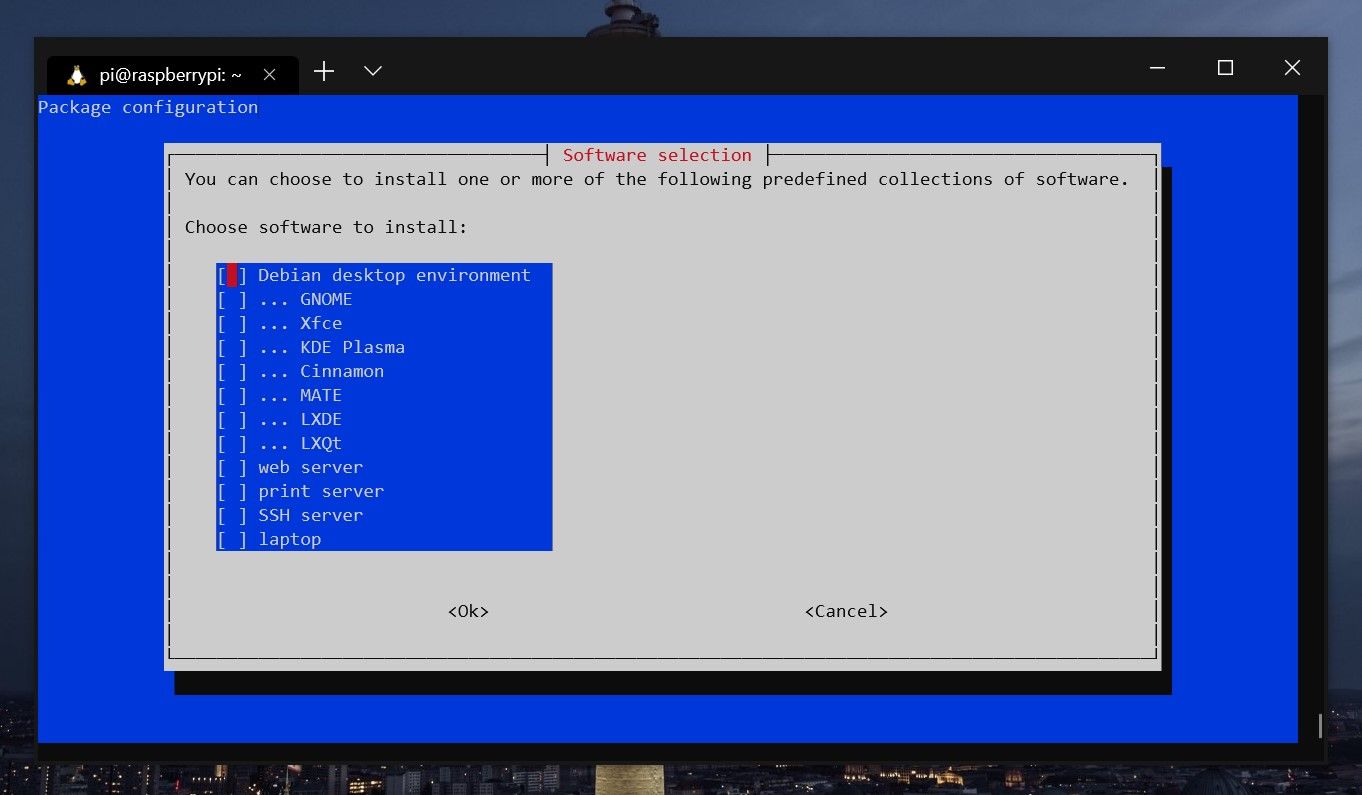
Use the arrow keys to go to GNOME and hit space. You will see an asterisk (*) appear to notify it's selected. Hit Enter on your keyboard.
The installation process took me around 20 minutes, so go make a brew. Aside from the Gnome desktop environment, there's a ton of dependencies required, so be patient.
Step 3 - Increase graphics memory allocation
Gnome is quite gutsy, so ensure you give the GPU at least 256mb of RAM:
sudo raspi-configThen go to 'Advanced Options', then 'Memory Split' and enter the amount you wish to provide. Hit enter and restart.
And that's it! Any issues or questions, add them to the comments below.