Run Raspbian from a USB Flash or SSD on a Raspberry Pi 4
Improve the performance of your Raspberry Pi 4 by running Raspbian from a SSD drive or USB Flash Drive following this tutorial.
UPDATE: A few people have got in touch recently saying these instructions no longer work with certain SSDs. I'll update the tutorial soon
The Raspberry 4 features a capable 4-core SOC (System on a Chip) with up to 4GB of RAM, but all this performance is bottle-necked by Raspbian being run from a SD card. In this tutorial, I will guide you through the process of running Raspbian from either a USB Flash Drive or external SSD drive.
What you'll need
The hardware you'll need to do this is as follows:
- A USB 3 Flash drive or USB 3 External SSD drive (recommended at least 32GB)
- A MicroSD card, at least 8GB
- A MicroSD card reader (if your computer doesn't have one built-in)
- A PC running MacOS, Windows or Linux
- Of course, a Raspberry Pi 4
Step 1 - Download Raspbian and Etcher
To begin, head to the [Raspberry Pi website](https://www.raspberrypi.org/downloads/raspbian/) and download the lite version of Raspbian if you're only wanting the base operating system or desktop if you're wanting that (at time of writing, I used Raspbian Buster Lite).
Download and install Etcher onto your computer. There's a version of Etcher for most major operating systems including Windows and MacOS.
Step 2 - Flash the MicroSD and USB Flash/SSD drive
Once you have Etcher installed, open it up and flash the MicroSD card and the Flash Drive/SSD Drive with the same Raspbian Lite image.
Once that's done, insert the MicroSD card into the Raspberry Pi 4 and plug in the USB Flash/external SSD drive.
Step 3 - Configure the Boot Device
Unlike the Raspberry Pi 2 and 3, the Raspberry Pi 4 cannot natively boot from a USB connected storage device. Instead, we need to instruct the operating system to boot from the USB device by changing the boot instruction saved on the MicroSD card.
On your Raspberry Pi, type the following command to view the connected devices:
fdisk -lYou'll see some devices listed like the ones shown in the screenshot below.
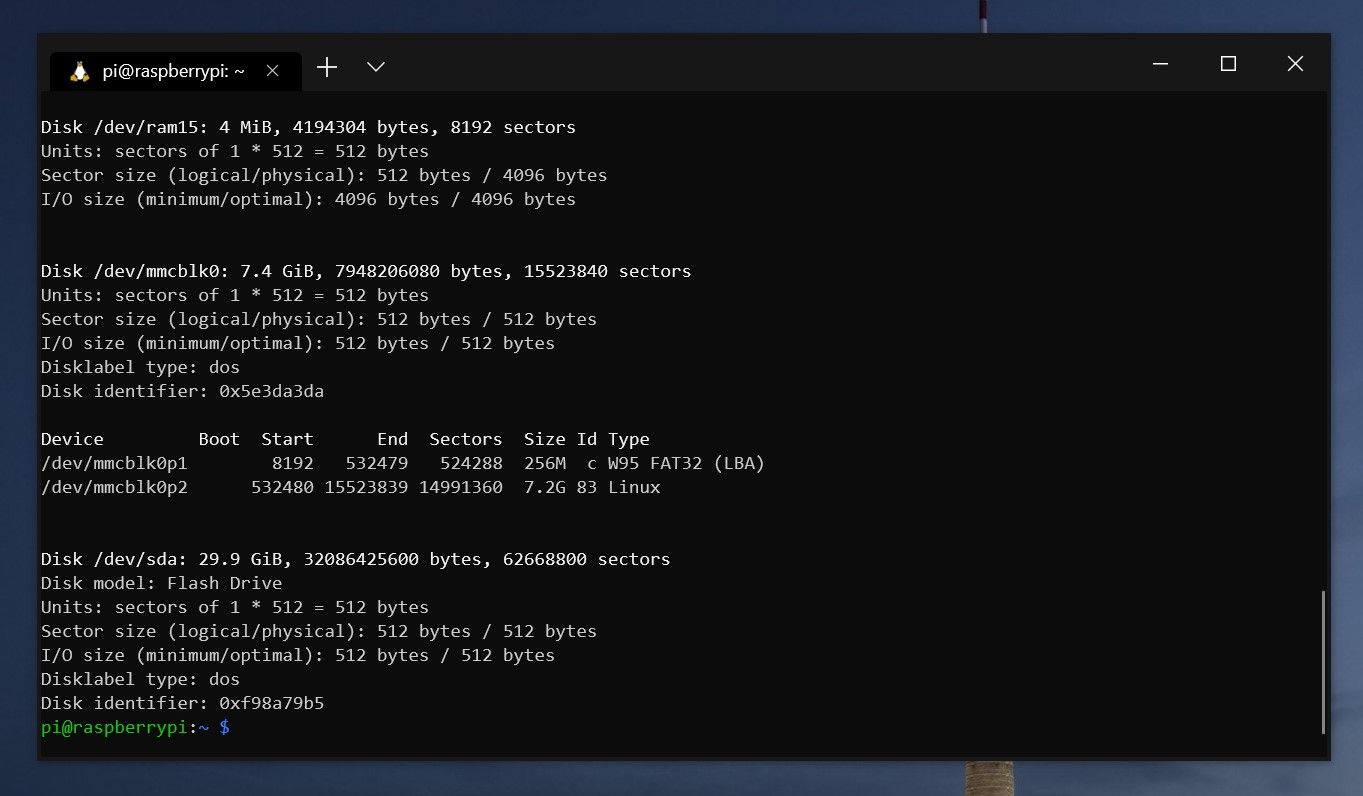
You'll notice two disks, one is Disk /dev/mmcblk0 and Disk /dev/sda. The first is the MicroSD from which we're currently booted from, and the other is the USB storage device. Important Your device may be called /dev/sdb. If this is the case, use this in place of sda.
Next we're going to edit the boot instruction. Type the following command to edit the boot instruction:
sudo nano /boot/cmdline.txtThere should only be one line in this file. At the end of this line, add the following (swapping sda to match your device if it wasn't /dev/sda):
root=/dev/sda2 rootfstype=ext4 rootwait
Save the file and exit (CTRL + X, then confirm with 'Y'). We're ready to boot from the USB storage device. Reboot your Raspberry Pi 4:
sudo rebootStep 4 - Expand the partition to use the full space available on your SSD drive/USB Flash drive
Once your Raspberry Pi 4 has restarted, run the following command to see the space available:
df -hThis will show the mounted partitions, as well as the space available:
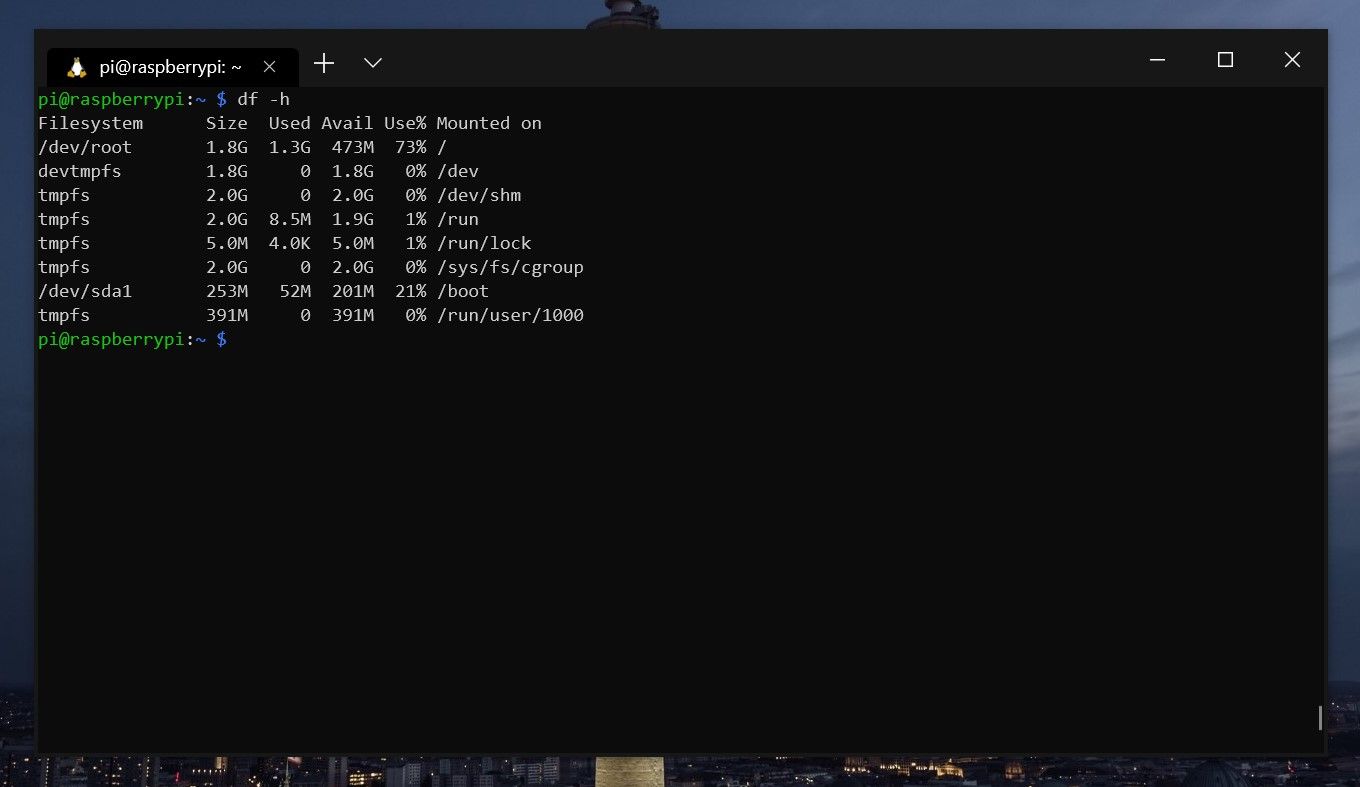
As you can see, there's only 1.8GB of usable space for us to play with. In my case, I'm using a USB Flash drive with 32GB of space. The raspi-config tool has the ability to expand a MicroSD card, but not a USB connected device. We need to modify the tool in order to do so.
Login as root:
sudo -iRun the following command to copy the raspi-config tool to our home folder:
cp /usr/bin/raspi-config ~Now we need to modify the config tool with these two commands:
sed -i 's/mmcblk0p/sda/' ~/raspi-config
sed -i 's/mmcblk0/sda/' ~/raspi-config
Next we launch the modified Raspi Config:
~/raspi-configOnce it launches, go to Advanced Options and then Expand Filesystem. This may take a while, depending on your attached USB storage device. Once it's finished, you'll see the following message:
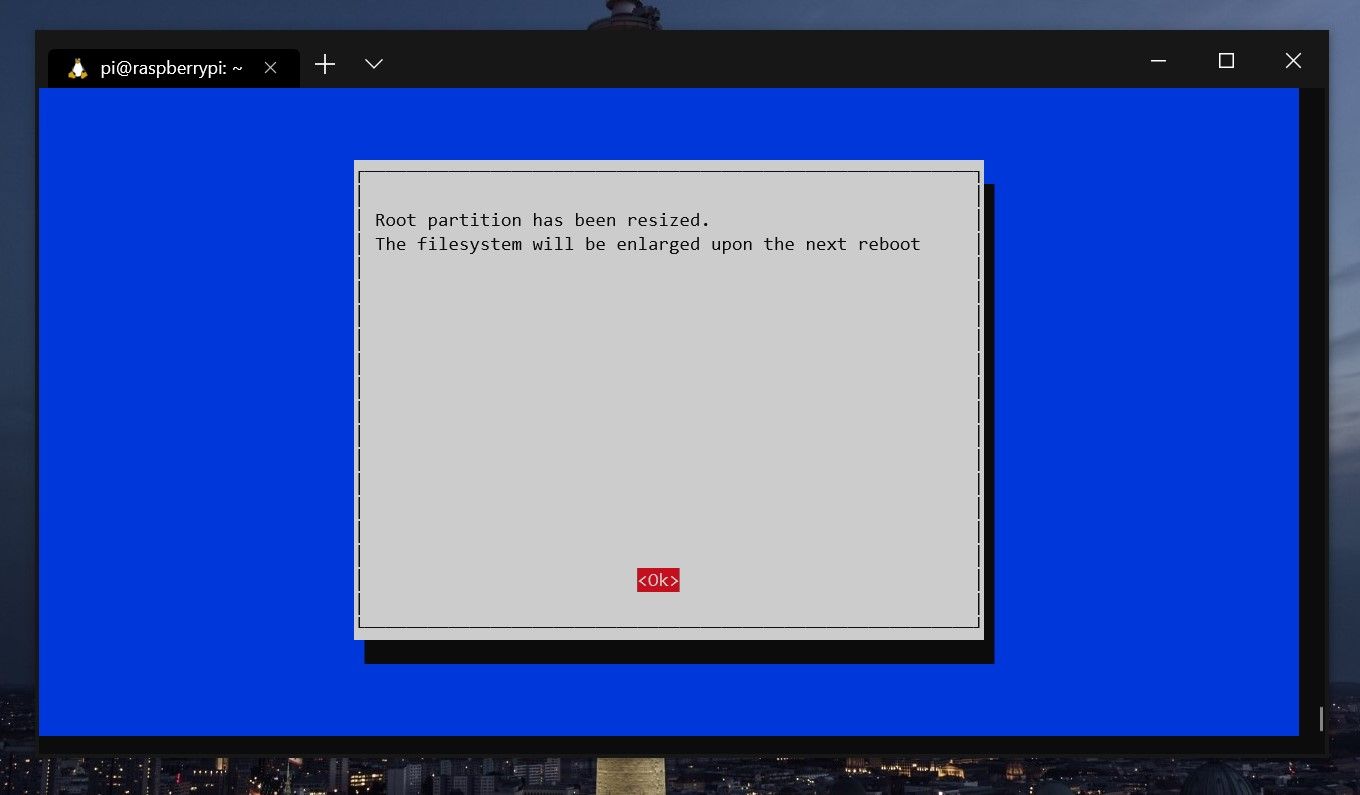
Hit ok and restart your Raspberry Pi:
sudo rebootStep 5 - Confirm the space available
Finally, we need to ensure the full space is available to the Raspberry Pi 4. Type this command once more:
df -hNow the output should reflect the space available:
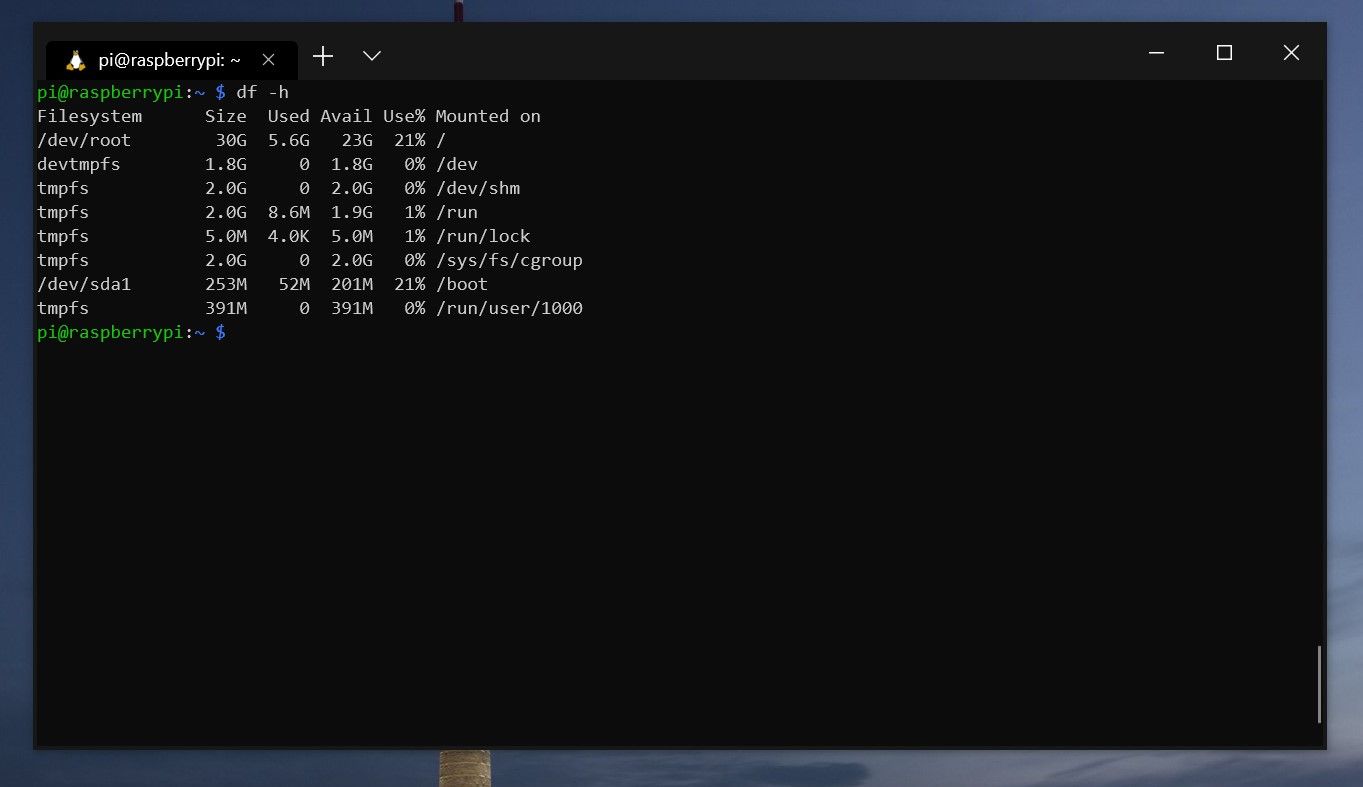
There is now 30G available to /dev/root. That's it! Let me know your thoughts and experiences in the comments below.