How to install Nextcloud on Raspberry Pi
In this tutorial, we'll install Nextcloud on a Raspberry Pi. Nextcloud is a self-hosted cloud file hosting service similar to Google Drive or Drop Box.

In this tutorial, we'll learn how to turn our Raspberry Pi into a cloud file hosting service by installing NextCloud.
I strongly advise that you either use a high-grade MicroSD card, or a decent SSD/USB Flash storage for your operating system. MicroSD cards can be slow, which will affect the database server's performance.
Recommended steps before following this tutorial
I'd recommend following my tutorial on setting up Dynamic DNS so that you can access your home Nextcloud installation via a hostname from anywhere in the world.
What is Nextcloud?
Nextcloud is an open source cloud file hosting service which started life as a fork from the OwnCloud project. Nextcloud brings cloud-based file storage similar to Google's One Drive or Microsoft's OneDrive.
There's a desktop and mobile app too, so you can ensure that your files are always in sync with your Nextcloud, and access it from across the world.
Step 1 - Install Nginx, PHP and MariaDB
Before we do anything, I'm going to assume that you've got Raspbian OS installed and are familiar with the command line. Let's start by ensuring we're all up-to-date:
sudo apt update -y && sudo apt upgrade -yBy default, Raspbian comes with Apache installed. Apache is a web server, but I prefer to use Nginx instead. We'll remove apache (if it's installed):
sudo apt remove apache2 -yOnce the updates have finished and we've removed apache, we need to install PHP, Nginx and MariaDB:
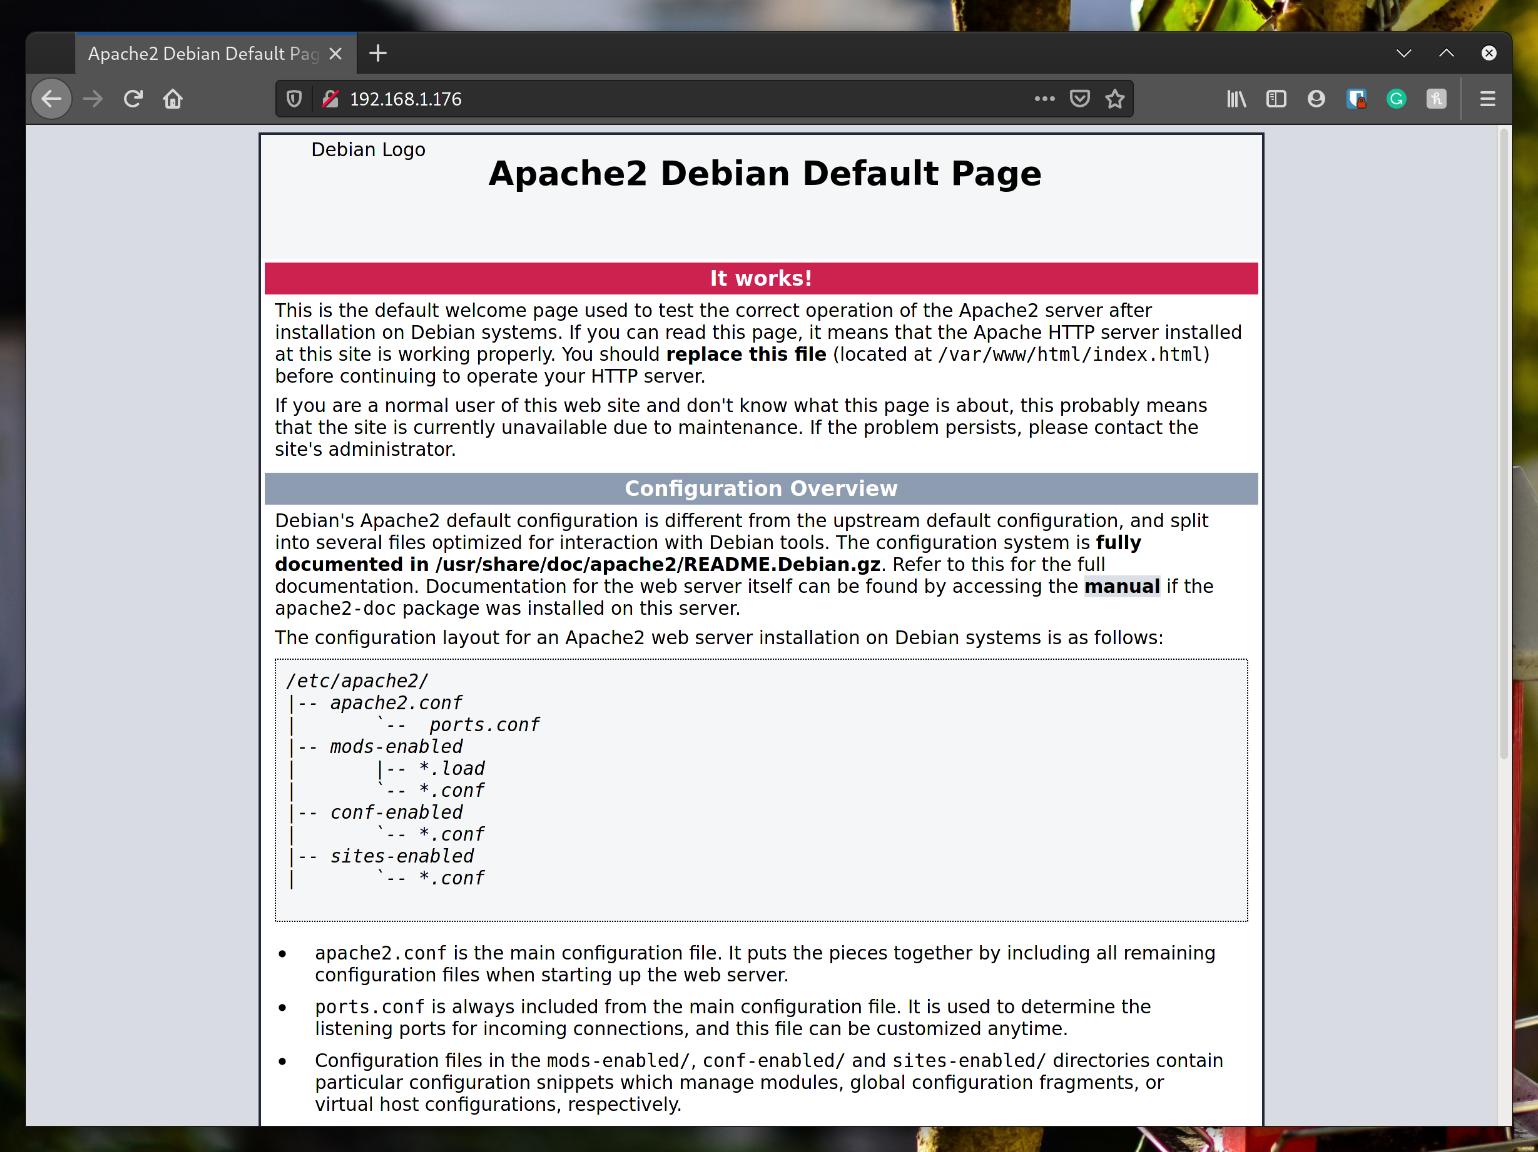
sudo apt install nginx mariadb-server php php-fpm php-mysql php-zip php-common php-zip php-xml php-mbstring php-gd php-curl -yThere we are, we've installed the basucs that we need to get Nextcloud installed on our Raspberry Pi. Let's try visiting our Raspberry pi in the web browser. Enter your Raspberry Pi's IP address in the address bar (or use localhost if you're on the browser on your Raspberry Pi). You should see the Apache test page, which has been left, but served up by nginx:
Step 2 - Configure the database server
Next, we need to configure the database server and change the default root password to something more secure. Stop the database server:
sudo service mariadb stop
Restart the server in safe mode:
sudo mysqld_safe --skip-networking &
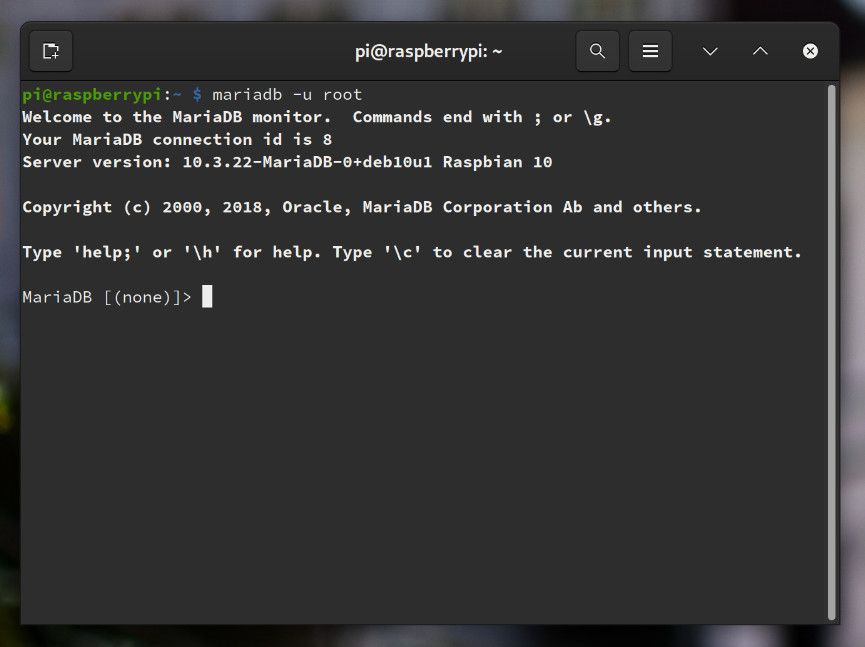
Once the service restarts, you'll need to login to MariaDB:
sudo mariadb -u root
You should now be logged in. You should see this:
Before we set the password, we need to reload the grant tables using this command:
FLUSH PRIVILEGES;
Next set your password for the root user, changing my_root_password for one of your choice:
ALTER USER 'root'@'localhost' IDENTIFIED BY 'my_new_password';
Once you've done this, flush privileges again:
FLUSH PRIVILEGES;
Now exit out of MariaDB:
exit
Normally, we'd restore the session using 'fg' and quit out of mysqld_safe and press CTRL + C to kill the process. For whatever reason, in the current version of Raspbian, I couldn't do this. Just restart your Pi instead:
sudo reboot
Step 3 - Create a database and database user for Nextcloud
We'll need to login to MariaDB using our newly created password:
mariadb -uroot -p
You should be asked to enter your password at this point. Once you're logged in, you'll be able to start creating the new database. Enter the following command to create the database:
CREATE DATABASE nextcloud;
Now, let's create a new user for ghost. We'll also call the user nextcloud. Change my_password for one of your choice. Bear in mind, we don't need to remember this password long term, so make it secure. Make sure you make a record of it for the time being:
CREATE USER 'nextcloud'@'localhost' IDENTIFIED BY 'my_password';Finally, we need to grant our new permissions for our new user on our new database:
GRANT ALL PRIVILEGES ON nextcloud.* TO 'nextcloud'@'localhost';
Finally, flush the privileges:
FLUSH PRIVILEGES;
Exit out of MariaDB:
exit
Step 4 - Download Nextcloud
I'll assume that you're in the home directory of your pi user. If not, switch to your home directory:
cd ~Next, let's download the latest stable version of Nextcloud:
wget https://download.nextcloud.com/server/releases/latest.zipWe will be serving files from /var/www/nextcloud so we don't need the default html directory. Run the following command to remove it:
rm -rf /var/www/htmlLet's now extract the contents of the zip file to the /var/www directory:
sudo unzip ./latest.zip -d /var/www/Finally, let's change the owner of the directory to the www-data system user:
sudo chown -R www-data:www-data /var/wwwStep 5 - Configure Nginx
Let's move on to configuring Nginx. We'll start by removing the default configuration:
sudo rm /etc/nginx/sites-enabled/defaultWe now need to create a new Nginx configuration for Nextcloud. In this example, we'll use Nano to create our new configuration. Create the new file:
sudo nano /etc/nginx/sites-available/nextcloud.conf
⚠️ At the time of writing, PHP-FPM was at version 7.3 in Raspbian. Double check your version by running php -v and changing line 2 accordingly on the configuration below.
Copy and paste this configuration into the nano editor screen:
upstream php-handler {
    server unix:/var/run/php/php7.3-fpm.sock;
}

server {
    listen 80;
    listen [::]:80;
    server_name localhost;

    add_header X-Content-Type-Options nosniff;
    add_header X-XSS-Protection "1; mode=block";
    add_header X-Robots-Tag none;
    add_header X-Download-Options noopen;
    add_header X-Permitted-Cross-Domain-Policies none;
    add_header Referrer-Policy no-referrer;
    fastcgi_hide_header X-Powered-By;

    root /var/www/nextcloud;

    location = /robots.txt {
        allow all;
        log_not_found off;
        access_log off;
    }

    location = /.well-known/carddav {
      return 301 $scheme://$host:$server_port/remote.php/dav;
    }
    location = /.well-known/caldav {
      return 301 $scheme://$host:$server_port/remote.php/dav;
    }

    client_max_body_size 512M;
    fastcgi_buffers 64 4K;

    gzip on;
    gzip_vary on;
    gzip_comp_level 4;
    gzip_min_length 256;
    gzip_proxied expired no-cache no-store private no_last_modified no_etag auth;
    gzip_types application/atom+xml application/javascript application/json application/ld+json application/manifest+json application/rss+xml applicaEnter this intion/vnd.geo+json application/vnd.ms-fontobject application/x-font-ttf application/x-web-app-manifest+json application/xhtml+xml application/xml font/opentype image/bmp image/svg+xml image/x-icon text/cache-manifest text/css text/plain text/vcard text/vnd.rim.location.xloc text/vtt text/x-component text/x-cross-domain-policy;

    location / {
        rewrite ^ /index.php;
    }

    location ~ ^\/(?:build|tests|config|lib|3rdparty|templates|data)\/ {
        deny all;
    }
    location ~ ^\/(?:\.|autotest|occ|issue|indie|db_|console) {
        deny all;
    }

    location ~ ^\/(?:index|remote|public|cron|core\/ajax\/update|status|ocs\/v[12]|updater\/.+|oc[ms]-provider\/.+)\.php(?:$|\/) {
        fastcgi_split_path_info ^(.+?\.php)(\/.*|)$;
        set $path_info $fastcgi_path_info;
        try_files $fastcgi_script_name =404;
        include fastcgi_params;
        fastcgi_read_timeout 1800;
        fastcgi_param SCRIPT_FILENAME $document_root$fastcgi_script_name;
        fastcgi_param PATH_INFO $path_info;
        fastcgi_param modHeadersAvailable true;
        fastcgi_param front_controller_active true;
        fastcgi_pass php-handler;
        fastcgi_intercept_errors on;
        fastcgi_request_buffering off;
    }

    location ~ ^\/(?:updater|oc[ms]-provider)(?:$|\/) {
        try_files $uri/ =404;
        index index.php;
    }

    location ~ \.(?:css|js|woff2?|svg|gif|map)$ {
        try_files $uri /index.php$request_uri;
        add_header Cache-Control "public, max-age=15778463";
        add_header X-Content-Type-Options nosniff;
        add_header X-XSS-Protection "1; mode=block";
        add_header X-Robots-Tag none;
        add_header X-Download-Options noopen;
        add_header X-Permitted-Cross-Domain-Policies none;
        add_header Referrer-Policy no-referrer;

        access_log off;
    }

    location ~ \.(?:png|html|ttf|ico|jpg|jpeg|bcmap)$ {
        try_files $uri /index.php$request_uri;
        access_log off;
    }
}
Let's now symlink our configuration to enable it:
sudo ln -s /etc/nginx/sites-available/nextcloud.conf /etc/nginx/sites-enabled/nextcloud.confFinally, let's restart nginx:
sudo service nginx restartWe will need to make a few tweaks to PHP in order to ensure the setup completes. The setup process is quite resource intensive, so we need to ensure that the setup wizard doesn't time out while it's executing.
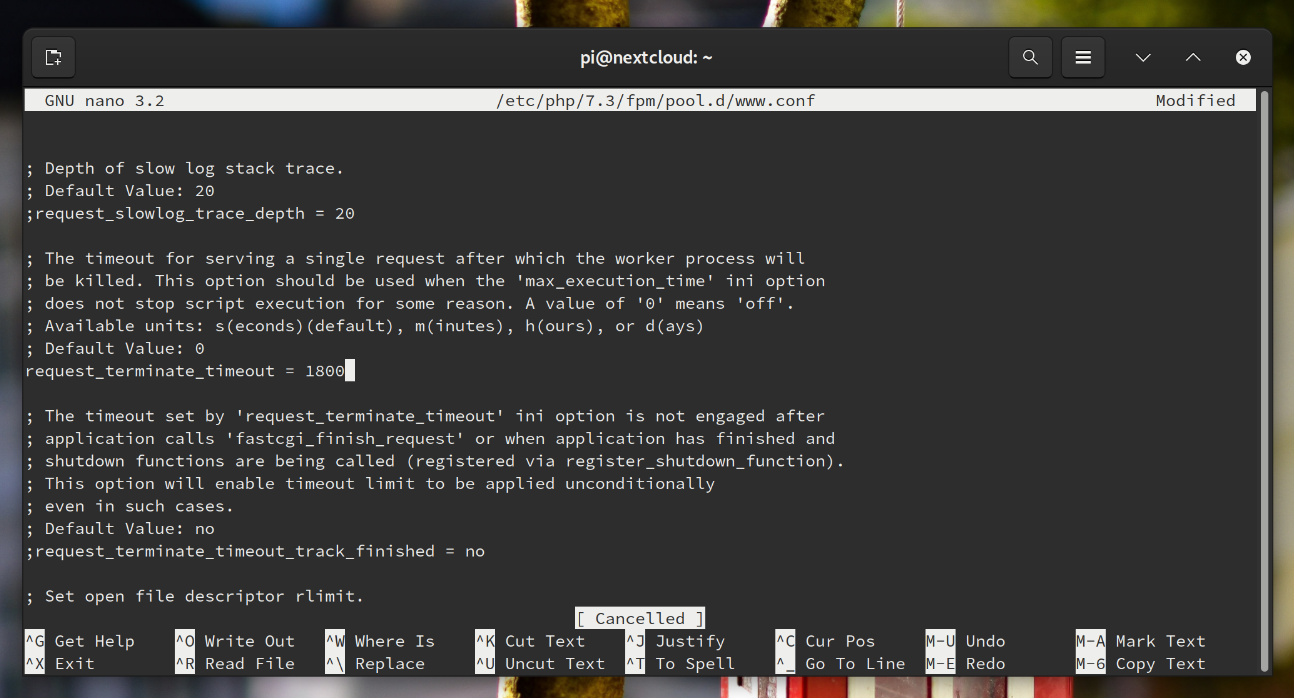
Remember to adjust the path below to your version of PHP, currently it's 7.3 in Raspbian. Edit the configuration:
sudo nano /etc/php/7.3/fpm/pool.d/www.confSearch for requst_terminate_timeout and set it to 1800. Your configuration should look something like this:
Step 6 - Finalise Nextcloud setup
We're almost there! Finally, all we need to do is to finish the Nextcloud setup from the browser. To do ths what we need to do is go to the IP address in the browser again (or localhost if you're on the PI that you've installed nextcloud to). You will see the Nextcloud setup screen:

Create yourself a admin username and password, and finally enter the MariaDB user details we created in step 3. Use localhost as the Database host.
When you're ready, go ahead and click 'Finish setup'. Once the setup is complete (it may take a while), you'll be redirected to the https version of the site. Obviously, with this being a local install, we don't have SSL (yet, we'll do that in another tutorial). Edit the config file:
sudo nano /var/www/nextcloud/config/config.phpEdit the entry for overwrite.cli.url and change it to http. Finally, restart PHP-FPM and Nginx and we're done:
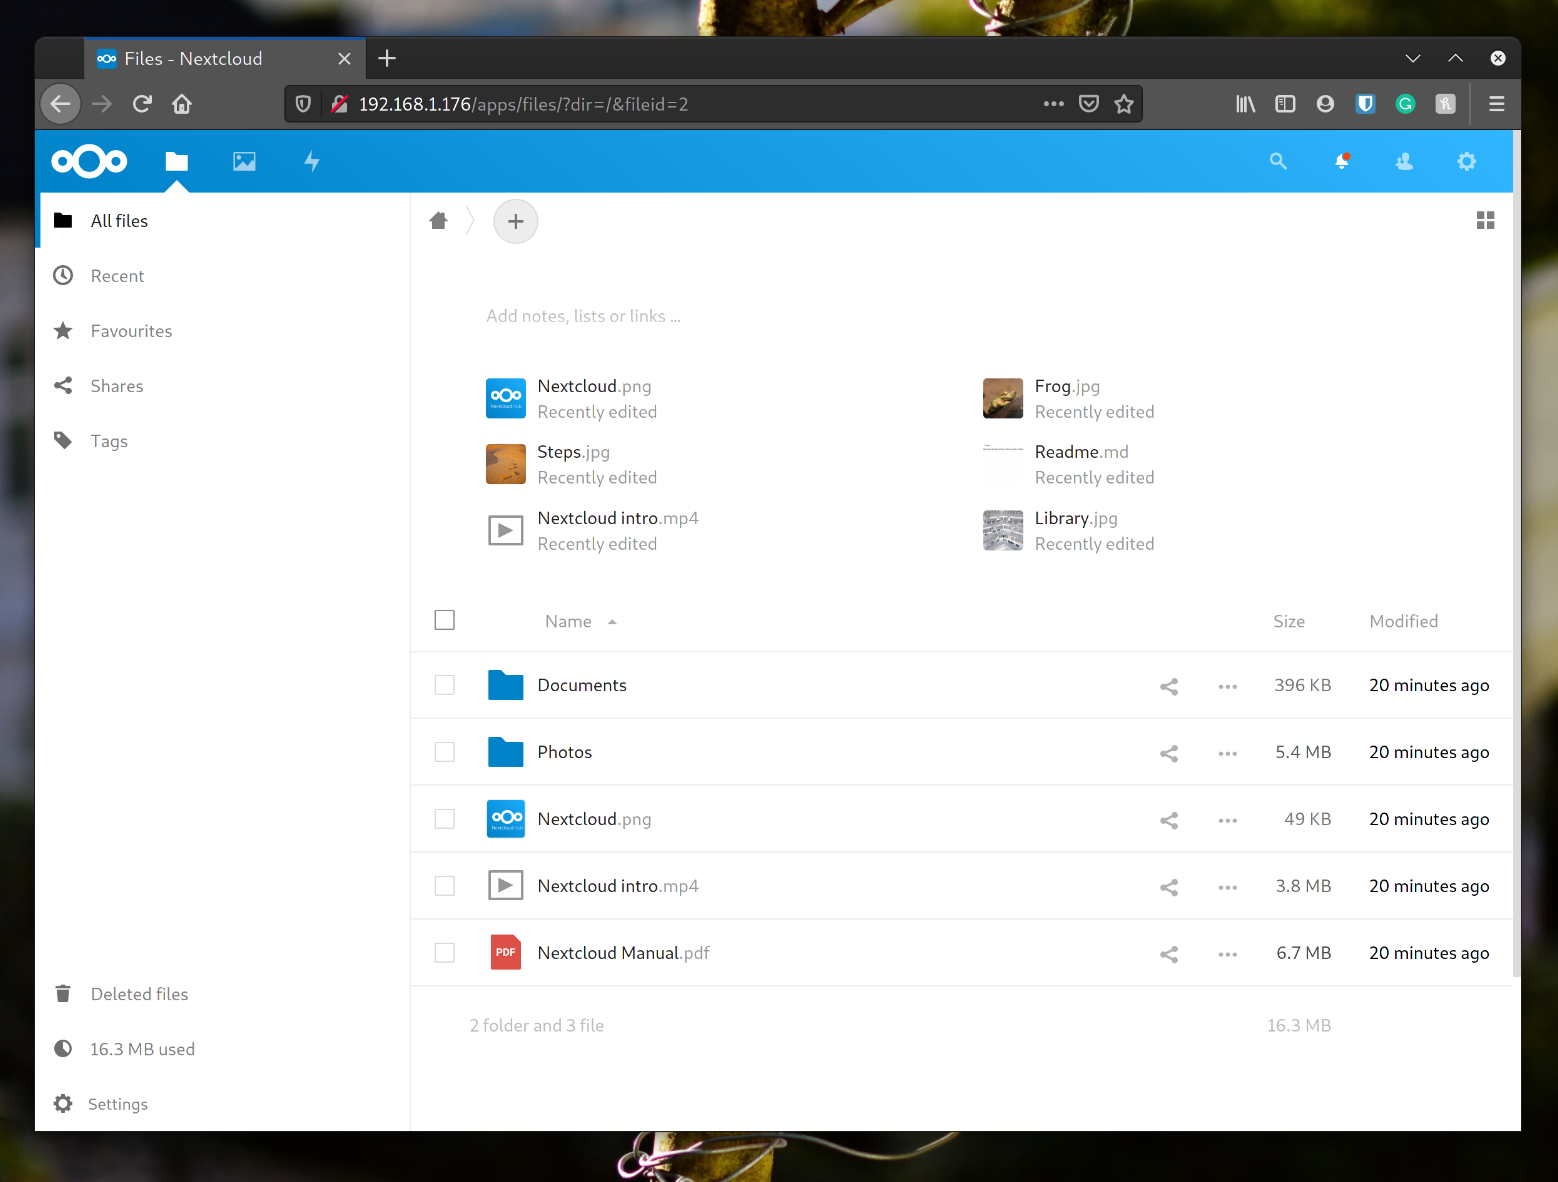
sudo service php7.3-fpm restart && sudo service nginx restartGo back to the URL of your Raspberry Pi (or localhost if you're on your Raspberry Pi) and login. You should see the demo files like this:
Conclusion
We've installed PHP, Nginx and MariaDB, then set up nginx. The next steps would be to open the installation to the world to make your nextcloud installation accessible outside of your network. Follow my tutorial on setting up a hostname to connect to your home network.