Tutorial - Install Nginx and PHP on Raspbian
Learn how to install Nginx and PHP on Raspbian in this tutorial. This is part of a series that will allow you to run WordPress from a Raspberry Pi


This is the first in a three part tutorial series on how to install and run NGINX on a Raspberry Pi. The first concentrates on installing and configuring Nginx web server and PHP on Raspbian OS, the second talks about installing MySQL server on Raspberry Pi, the third will walk you through installing WordPress on Nginx.
For many, Apache2 has become too bloated, and uses more resources than it needs to. Nginx is a very light-weight web server, that works great on a Raspberry Pi.
Prerequisites
Before doing this tutorial I assume that you are familiar with Terminal, and are proficient and comfortable in command line interface.
Step 1 – Install Nginx
To begin, using terminal or accessing directly, type the following command to ensure everything's up-to-date before installing the required packages:
sudo apt-get update && sudo apt-get upgrade
Chances are there are packages that'll need updating by running this command. If prompted, hit 'Y' to install the updates. Now type the following command to install Nginx:
sudo apt-get install nginx
There we go, we've now got nginx installed. Next, we want to launch nginx and test that it's working ok. Type the following command into the command line interface:
sudo /etc/init.d/nginx start
If all goes well, you sho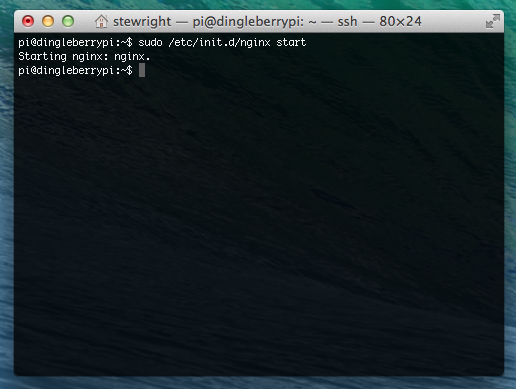 ](GHOST_URL/content/images/2014/06/Screen-Shot-2014-06-13-at-13.43.02.png)
If you visit your Raspberry Pi's IP address in your web browser, you should see the default Nginx page, which looks a little something like this:

Great success! You now have Nginx running on your Raspberry Pi. Next, we'll install PHP.
Step 2 – Install PHP
The packages required for PHP to work with Nginx is a little different to those when using PHP with Apache2. PHP runs as a FastCGI interface, so we need to install the PHP FPM package by typing the following command:
sudo apt-get install php5-fpm
Once we've done that we're almost ready to rock. We next need to make a few minor changes to the Nginx configuration to begin using PHP with Nginx.
Step 3 – Configure Nginx and PHP
You're almost there. Similar to Apache2, Nginx works on a virtual hosts principle, but is arguably easier to configure multiple vhosts on Nginx. We'll look at this in a later tutorial.
Next, we're going to adjust the default configuration to allow Nginx to start serving content using PHP. Begin by typing the following command:
sudo nano /etc/nginx/sites-available/default
The Nano editor will appear. If you're more comfortable using VI, use this command instead:
sudo vi /etc/nginx/sites-available/default
Scroll down the configuration file until you find the 'server' block with the following lines contained within it:
#listen 80;
## listen for ipv4; this line is default and implied
#listen [::]:80 default_server ipv6only=on;
## listen for ipv6
Uncomment them both out by removing the first #, so that they read like this:
listen 80;
## listen for ipv4; this line is default and implied
listen [::]:80 default_server ipv6only=on;
## listen for ipv6
This allows Nginx to listen on port 80 (the default http port) and listen for both IPv4 and IPv6 requests. Next we need to edit the name of our server to match our domain. In my care, the domain is dingleberrypi.com but be sure to substitute this with your own domain or IP address.
# Make site accessible from http://localhost/
server_name www.raspipress.com;
Change the index line from this:
index index.html index.htm;
To this:
index index.php index.html index.htm;
This allows files with the name index.php to be served up as the default index page, and takes priority over index.html and index.htm. Now we need to tell the configuration how to handle PHP files. Scroll down until you see this:
#location ~ .php$ {
    # fastcgi_split_path_info ^(.+.php)(/.+)$;
    # # NOTE: You should have "cgi.fix_pathinfo = 0;" in php.ini # # # With php5-cgi alone:
    # fastcgi_pass 127.0.0.1:9000;
    # # With php5-fpm:
    # fastcgi_pass unix:/var/run/php5-fpm.sock;
    # fastcgi_index index.php;
    # include fastcgi_params;
#}
Uncomment some of the lines so that it reads like this:
location ~ .php$ {
    fastcgi_split_path_info ^(.+.php)(/.+)$;
    # NOTE: You should have "cgi.fix_pathinfo = 0;" in php.ini
    # # With php5-cgi alone:
    # fastcgi_pass 127.0.0.1:9000;
    # # With php5-fpm:
    fastcgi_pass unix:/var/run/php5-fpm.sock;
    fastcgi_index index.php;
    include fastcgi_params;
}
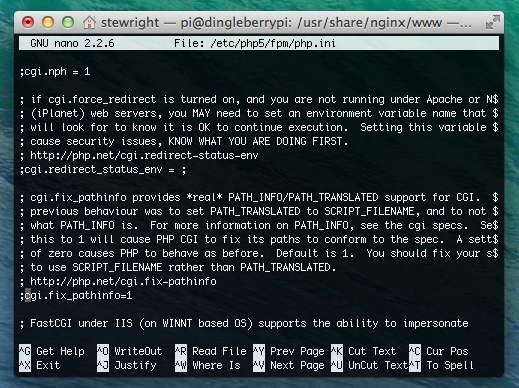
Be careful to edit the correct lines. We're using a socket, so uncomment the configuration accordingly. Finally, we need to change the PHP configuration to fix a possible security vulnerability. Type the following command to edit the PHP configuration file:
sudo nano /etc/php5/fpm/php.ini
Scroll down (or search for the line using CTRL + W in nano) for:
;cgi.fix_pathinfo=1
Uncomment the line by removing the semicolon from the start, and change the value from 1 to 0. Save and exit nano.
All we need to do now is restart php5-fpm and nginx to make the configuration changes take:
sudo /etc/init.d/php5-fpm reload && sudo /etc/init.d/nginx reload
Step 4 – Test the PHP configuration
Now all that's left to do is to test to ensure PHP and Nginx are correctly configured. Navigate to the default document root:
cd /usr/share/nginx/www
Create a file called index.php:
sudo nano index.php
Add the following line to the file, save and exit nano:
<?php phpinfo(); ?>
Visit your raspberry pi in your web browser by typing its domain name or IP address, and you should see the PHP info page:
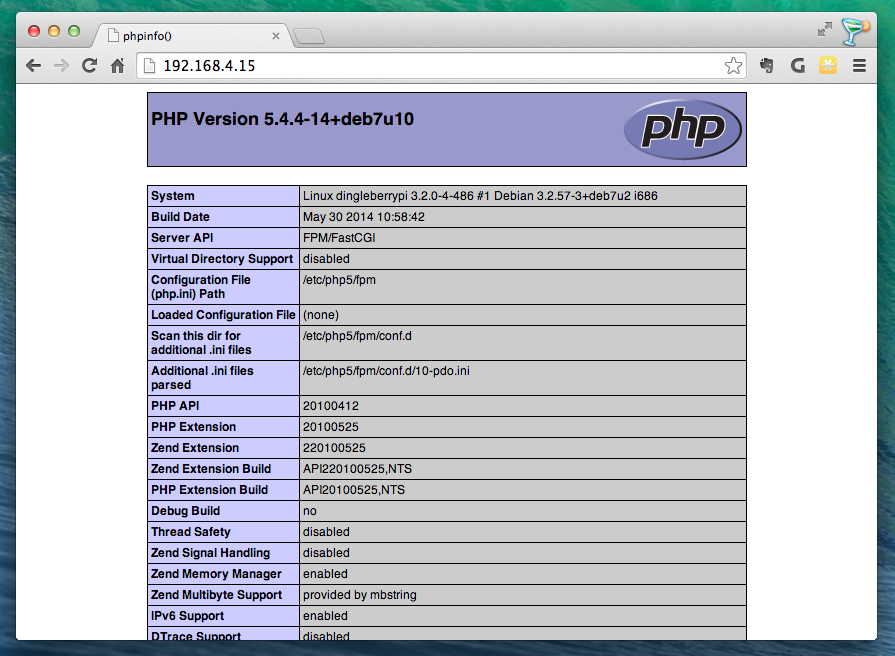
That's it! We've installed, configured and tested PHP5 and Nginx. Grab a brew, you've earned it! Any questions or comments, feel free to add them below.
Next, we'll look at installing MySQL on Raspberry Pi and creating a new database and database user for WordPress to use.